Please read all these, and please try it all. You will find it very interesting, I assure..
Hiding the Windows Live Messenger icon
If you use Windows Live Messenger a lot, you'll have noticed that the icon now resides on the taskbar, where you can easily change status and quickly send an IM to someone. If you prefer to keep Windows Live Messenger in the system tray, where it's been for previous releases, just close Windows Live Messenger, edit the shortcut properties and set the application to run in Windows Vista compatibility mode.
Customise UAC
Windows Vista's User Account Control was a good idea in practice, but poor implementation put many people off - it raised far too many alerts. Fortunately Windows 7 displays less warnings by default, and lets you further fine-tune UAC to suit your preferred balance between security and a pop-up free life (Start > Control Panel > Change User Account Control Settings).
Use Sticky Notes
The Sticky Notes app is both simpler and more useful in Windows 7. Launch StikyNot.exe and you can type notes at the keyboard; right-click a note to change its colour; click the + sign on the note title bar to add another note; and click a note and press Alt + 4 to close the note windows (your notes are automatically saved).
Open folder in new process
By default Windows 7 opens folders in the same process. This saves system resources, but means one folder crash can bring down the entire shell. If your system seems unstable, or you're doing something in Explorer that regularly seems to causes crashes, then open Computer, hold down Shift, right-click on your drive and select Open in New Process. The folder will now be launched in a separate process, and so a crash is less likely to affect anything else.
Watch more videos
Windows Media Player 12 is a powerful program, but it still won't play all the audio and video files you'll find online. Fortunately the first freeware Windows 7 codecs package [shark007.net/win7codecs.html] has been released, and installing it could get your troublesome multimedia files playing again.
Preview fonts
Open the Fonts window in Windows XP and Vista and you'll see the font names, probably with icons to tell you whether they're TrueType or OpenType, but that's about it. Windows 7 sees some useful font-related improvements.
Open the new fonts window and you'll find a little preview for every font, giving you a quick idea of how they're going to look.
The tedium of scrolling through multiple entries for each family, like Times New Roman, Times New Roman Bold, Times New Roman Bold Italic and so on, has finally ended. There's now just a single entry for each font (though you can still see all other members of the family).
And there's a new OpenType font, Gabriola, added to the mix. It's an attractive script font, well worth a try the next time you need a stylish document that stands out from the crowd.
Restore your gadgets
Windows 7 has tightened up its security by refusing to run gadgets if UAC has been turned off, so limiting the damage malicious unsigned gadgets can do to your system. If you've disabled UAC, miss your gadgets and are happy to accept the security risk, though, there's an easy Registry way to get everything back to normal. Run REGEDIT, go to HKEY_LOCAL_MACHINE\SOFTWARE\Microsoft\Windows\CurrentVersion\Sidebar\Settings, create a new DWORD value called AllowElevatedProcess and set it to 1. Your gadgets should start working again right away.
New WordPad formats
By default WordPad will save documents in Rich Text Format, just as before. But browse the Save As Format list and you'll see you can also save (or open, actually) files in the Office 2007 .docx or OpenDocument .odt formats.
Wednesday, August 3, 2011
Monday, August 1, 2011
A few Windows 7 tips and tricks
Set the time zone
System administrators will appreciate the new command line tzutil.exe utility, which lets you set a PC's time zone from scripts. If you wanted to set a PC to Greenwich Mean Time, for instance, you'd use the command
tzutil /s "gmt standard time"
The command "tzutil /g" displays the current time zone, "tzutil /l" lists all possible time zones, and "tzutil /?" displays details on how the command works.
Calibrate your screen
The colours you see on your screen will vary depending on your monitor, graphics cards settings, lighting and more, yet most people use the same default Windows colour profile. And that means a digital photo you think looks perfect might appear very poor to everybody else. Fortunately Windows 7 now provides a Display Colour Calibration Wizard that helps you properly set up your brightness, contrast and colour settings, and a ClearType tuner to ensure text is crisp and sharp. Click Start, type DCCW and press Enter to give it a try.
Clean up Live Essentials
Installing Windows Live Essentials will get you the new versions of Mail, Movie Maker, Photo Gallery and others - great. Unfortunately it also includes other components that may be unnecessary, but if you like to keep a clean system then these can be quickly removed.
If you left the default "Set your search provider" option selected during installation, for instance, Windows Live will install Choice Guard, a tool to set your browser home page and search engine, and prevent other programs from changing them. If this causes problems later, or you just decide you don't need it, then Choice Guard may be removed by clicking Start, typing msiexec /x and pressing [Enter].
Windows Live Essentials also adds an ActiveX Control to help upload your files to Windows Live SkyDrive, as well as the Windows Live Sign-in Assistant, which makes it easier to manage and switch between multiple Windows Live accounts. If you're sure you'll never need either then remove them with the Control Panel "Uninstall a Program" applet.
Add network support
By default Windows Live MovieMaker won't let you import files over a network, but a quick Registry tweak will change this. Run REGEDIT, browse to HKEY_CURRENT_USER\Software\Microsoft\Windows Live\Movie Maker, add a DWORD value called AllowNetworkFiles and set it to 1 to add network support.
Activate XP mode
If you've old but important software that no longer runs under Windows 7, then you could try using XP Mode, a virtual copy of XP that runs in a window on your Windows 7 desktop. But there's a big potential problem, as XP Mode only works with systems that have hardware virtualisation (AMD-V or Intel VT) built-in and turned on. If you've a compatible CPU then this may just be a matter of enabling the option in your BIOS set-up program, however some high profile brands, including Sony Vaio, disable the setting for "security reasons". And that blocks XP Mode from working, too.
One solution has emerged, but it's a little risky, as essentially you'll have to alter a byte in your laptop firmware and hope this doesn't have any unexpected side-effects. Gulp. If you're feeling brave then take a look at the Feature Enable Blog for the details, but don't blame us if it goes wrong.
A safer approach might be to use VirtualBox, a virtualisation tool that doesn't insist on hardware support, but then you will need to find a licensed copy of XP (or whatever other Windows version your software requires) for its virtual machine.
Enable virtual Wi-Fi
Windows 7 includes a little-known new feature called Virtual Wi-Fi, which effectively turns your PC or laptop into a software-based router. Any other Wi-Fi-enabled devices within range - a desktop, laptop, an iPod perhaps - will "see" you as a new network and, once logged on, immediately be able to share your internet connection.
This will only work if your wireless adapter driver supports it, though, and not all do. Check with your adapter manufacturer and make sure you've installed the very latest drivers to give you the best chance.
Once you have driver support then the easiest approach is to get a network tool that can set up virtual Wi-Fi for you. Virtual Router (below) is free, easy to use and should have you sharing your internet connection very quickly.
Virtual router
If you don't mind working with the command line, though, maybe setting up some batch files or scripts, then it's not that difficult to set this up manually. See Turn your Windows 7 laptop into a wireless hotspot for more.
Recover locked-up apps
If an application locks up under a previous version of Windows then there was nothing you could do about it. A new Windows 7 option, however, can not only explain the problem, but may get your program working again without any loss of data.
When the lockup occurs, click Start, type RESMON and click the RESMON.EXE link to launch the Resource Monitor.
Find your frozen process in the CPU pane (it should be highlighted in red), right-click it and select Analyze Wait Chain.
If you see at least two processes in the list, then the lowest, at the end of the tree, is the one holding up your program. If it's not a vital Windows component, or anything else critical, then save any work in other open applications, check the box next to this process, click End Process, and your locked-up program will often spring back to life.
Waitchain
Fault-Tolerant Help
Windows 7 includes a new feature called the Fault Tolerant Help (FTH), a clever technology that looks out for unstable processes, detects those that may be crashing due to memory issues, and applies several real-time fixes to try and help. If these work, that's fine - if not, the fixes will be undone and they won't be applied to that process again.
While this is very good in theory, it can leave you confused as some applications crash, then start working (sometimes) for no apparent reason. So if you'd like to check if the FTH is running on your PC, launch REGEDIT, and go to HKEY_LOCAL_MACHINE\Software\Microsoft\FTH - any program currently being protected by the FTH will be listed in the State key.
Experienced users may also try tweaking the FTH settings to catch more problems, and perhaps improve system stability. A post on Microsoft's Ask The Performance Team blog (bit.ly/d1JStu) explains what the various FTH Registry keys mean.
Automatically switch your default printer
Windows 7's location-aware printing allows the operating system to automatically switch your default printer as you move from one network to another.
To set this up, first click Start, type Devices, and click the Devices and Printers link.
Select a printer and click Manage Default Printers (this is only visible on a mobile device, like a laptop - you won't see it on a PC).
Choose the "Change my default printer when I change networks" option, select a network, the default printer you'd like to use, and click Add.
Repeat the process for other networks available, and pick a default printer for each one.
And now, as you connect to a new network, Windows 7 will check this list and set the default printer to the one that you've defined.
Explore God Mode
Windows 7 has changed Control Panel a little, but it's still too difficult to locate all the applets and options that you might need. God Mode, however, while not being particularly godlike, does offer an easier way to access everything you could want from a single folder.
To try this out, create a new folder and rename it to:
Windows 7 god mode
The first part, "Everything" will be the folder name, and can be whatever you want: "Super Control Panel", "Advanced", "God Mode" if you prefer.
The extension, ED7BA470-8E54-465E-825C-99712043E01C, must be entered exactly as it is here, though, including the curly brackets. When you press [Enter] this part of the name will disappear, and double-clicking the new folder will display shortcuts to functions in the Action Centre, the Network and Sharing Centre, Power options, troubleshooting tools, user accounts and others - more than 260 options in total.
Right-click everything
At first glance Windows 7 bears a striking resemblance to Vista, but there's an easy way to begin spotting the differences - just right-click things.
Right-click an empty part of the desktop, for instance, and you'll find a menu entry to set your screen resolution. No need to go browsing through the display settings any more.
Right-click the Explorer icon on the taskbar for speedy access to common system folders: Documents, Pictures, the Windows folder, and more.
And if you don't plan on using Internet Explorer then you probably won't want its icon permanently displayed on the taskbar. Right-click the icon, select 'Unpin this program from the taskbar', then go install Firefox, instead.
Go through my other posts to know more about Windows tips and tricks..
10 new Windows 7 tips, tricks and secrets
1. Problem Steps Recorder
As the local PC guru you're probably very used to friends and family asking for help with their computer problems, yet having no idea how to clearly describe what's going on. It's frustrating, but Microsoft feels your pain, and Windows 7 will include an excellent new solution in the Problem Steps Recorder.
When any app starts misbehaving under Windows 7 then all your friends need do is click Start, type PSR and press Enter, then click Start Record. If they then work through whatever they're doing then the Problem Steps Recorder will record every click and keypress, take screen grabs, and package everything up into a single zipped MHTML file when they're finished, ready for emailing to you. It's quick, easy and effective, and will save you hours of troubleshooting time.
2. Burn images
Windows 7 finally introduces a feature that other operating systems have had for years - the ability to burn ISO images to CDs or DVDs. And it couldn't be much easier to use. Just double-click the ISO image, choose the drive with the blank disc, click Burn and watch as your disc is created.
3. Create and mount VHD files
Microsoft's Virtual PC creates its virtual machine hard drives in VHD files, and Windows 7 can now mount these directly so you can access them in the host system. Click Start, type diskmgmt.msc and press Enter, then click Action > Attach VHD and choose the file you'd like to mount. It will then appear as a virtual drive in Explorer and can be accessed, copied or written just like any other drive.
Click Action > Create VHD and you can now create a new virtual drive of your own (right-click it, select Initialise Disk, and after it's set up right-click the unallocated space and select New Simple Volume to set this up). Again, you'll be left with a virtual drive that behaves just like any other, where you can drag and drop files, install programs, test partitioning software or do whatever you like. But it's actually just this VHD file on your real hard drive which you can easily back up or share with others. Right-click the disk (that's the left-hand label that says "Disk 2" or whatever) and select Detach VHD to remove it.
The command line DISKPART utility has also been upgraded with tools to detach a VHD file, and an EXPAND command to increase a virtual disk's maximum size. Don't play around with this unless you know what you're doing, though - it's all too easy to trash your system.
4. Troubleshoot problems
If some part of Windows 7 is behaving strangely, and you don't know why, then click Control Panel > Find and fix problems (or 'Troubleshooting') to access the new troubleshooting packs. These are simple wizards that will resolve common problems, check your settings, clean up your system and more.
5. Startup repair
If you've downloaded Windows 7 (and even if you haven't) it's a good idea to create a system repair disc straight away in case you run into problems booting the OS later on. Click Start > Maintenance > Create a System Repair Disc, and let Windows 7 build a bootable emergency disc. If the worst does happen then it could be the only way to get your PC running again.
6. Take control
Tired of the kids installing dubious software or running applications you'd rather they left alone? AppLocker is a new Windows 7 feature that ensures users can only run the programs you specify. Don't worry, that's easier to set up than it sounds: you can create a rule to allow everything signed by a particular publisher, so choose Microsoft, say, and that one rule will let you run all signed Microsoft applications. Launch GPEDIT.MSC and go to Computer Configuration > Windows Settings > Security Settings > Application Control Policies > AppLocker to get a feel for how this works.
7. Calculate more
At first glance the Windows 7 calculator looks just like Vista's version, but explore the Mode menu and you'll see powerful new Statistics and Programmer views. And if you're clueless about bitwise manipulation, then try the Options menu instead. This offers many different unit conversions (length, weight, volume and more), date calculations (how many days between two dates?), and spreadsheet-type templates to help you calculate vehicle mileage, mortgage rates and more.
Don't take any Windows 7 applet at face value, then - there are some very powerful new features hidden in the background. Be sure to explore every option in all Windows applets to ensure you don't miss anything important.
8. Switch to a projector
Windows 7 now provides a standard way to switch your display from one monitor to another, or a projector - just press Win+P or run DisplaySwitch.exe and choose your preferred display. (This will have no effect if you've only one display connected.)
9. Get a power efficiency report
If you have a laptop, you can use the efficiency calculator to get Windows 7 to generate loads of useful information about its power consumption. Used in the right way, this can help you make huge gains in terms of battery life and performance. To do this you must open a command prompt as an administrator by typing 'cmd' in Start Search, and when the cmd icon appears, right-click it and choose Run as administrator.
Then at the command line, just type in 'powercfg -energy' (without quotes) and hit Return, and Windows 7 will scan your system looking for ways to improve power efficiency. It will then publish the results in an HTML file, usually in the System32 folder. Just follow the path it gives you to find your report.
10. Understanding System Restore
Using System Restore in previous versions of Windows has been something of a gamble. There's no way of telling which applications or drivers it might affect - you just have to try it and see.
Windows 7 is different. Right-click Computer, select Properties > System Protection > System Restore > Next, and choose the restore point you'd like to use. Click the new button to 'Scan for affected programs' and Windows will tell you which (if any) programs and drivers will be deleted or recovered by selecting this restore point. (Read our full Windows 7 System Restore tutorial.)
More tips will be posted soon, wait for them..
Saturday, July 30, 2011
My Windows 7 is slow!!!
Windows 7 Slow? Make it Fast!
Author:JasonD Webber
Windows 7 is really a pleasure to use, but it can be slow on some computers. Certainly not everyone can upgrade their computers to match an optimal Windows 7 configuration, and even top-end computers can run it slow too. Fret not, there are things you can do.
1. Switch off the Aero theme. It’s truly a waste, because Aero is what makes Windows 7 so nice to look at. However, some people don’t care much for the looks, but place their priority on performance. If this is you, you can turn off Aero by clicking on “Personalize” when you right-click on the Windows Desktop, and then choosing “Window Color”. While you’re at it, remember to turn off transparency there, then go to “Open classic appearance properties…”. By choosing another theme, Aero will be turned off. You will notice an almost immediate improvement in responsiveness.
2. Get rid of the sidebar. Personally I really dislike the sidebar, and always make it a point to remove it. Not only does it use up valuable computer resources and slows it down, it also makes my screen look cluttered. If you’re the same, feel free to do a right-click on the sidebar,” then choose Properties” and unselect “Start sidebar when Windows Starts”.
3. Get rid of unnecessary startup programs. Many software, when installed, place themselves into Windows’ startup list. This means that when Windows 7 starts up, these programs will load at the same time. This greatly increases the startup time and also uses up precious memory, slowing the computer down. To remove them, click on Start, and enter “msconfig” in the search field. Msconfig is a program that comes with Windows 7 that allows you to control what gets loaded when Windows starts.
4. Most important of all perhaps is the optimization of the Windows registry. The registry has a tendency to bloat and gets filled with invalid data after some time. Because of its importance, it is important to keep the registry optimized so as to have a good Windows performance. You can use a good registry cleaner software to do this. A registry cleaner a search the entire registry, fixing problems and optimizing it.
Windows 7 is good
My Favorite Windows 7 Tips – So Far
Author:Richard Weston
I have been using Windows 7 Ultimate now for about 3 weeks on my main work computer, and so far, I love it. It’s fast, stable and has a lot of very cool new features. The new task bar is just great, it makes it real easy to switch between applications when you keep several open at once like I do. I have started to discover a few tips and tricks to help me get the most from Windows 7, and I thought I would share some of my favorites with you.
Problem Steps Recorder – Having no idea how to clearly describe what’s going on when your computer acts up to your support guru is frustrating, but Microsoft is willing to help. Windows 7 includes an excellent new solution in the Problem Steps Recorder.
When any application starts misbehaving under Windows 7 then all you need to do is click Start, type PSR and press Enter, then click Start Record. Work through whatever you’ve been doing and Problem Steps Recorder will record every click and key press, take screen grabs, and package everything up into a single zipped MHTML file when they’re finished, ready for emailing to your favorite geek. It’s quick, easy and effective, and will save you and your geek hours of troubleshooting time.
Switch to a projector – Windows 7 now provides a standard way to switch your display from one monitor to another, or a projector. Just press Win+ and choose your preferred display. (This will have no effect if you’ve only one display connected.) Especially handy when using a laptop to give a presentation.
Right-click everything – At first glance Windows 7 bears a striking resemblance to Vista, but there’s an easy way to begin spotting the differences – just right-click things. Right-click an empty part of the desktop, for instance, and you’ll find a menu entry to set your screen resolution. No need to go browsing through the display settings any more. Right-click the Explorer icon on the task bar for speedy access to common system folders: Documents, Pictures, the Windows folder, and more.
]]>
Minimize quickly with shake – If you have multiple windows open on your desktop and things are getting too cluttered, it used to be a time-consuming process to close them all down. In Windows 7 you can use the Aero Shake feature to minimise everything in seconds, using a cool mouse gesture. Grab the title bar of the window you wish to keep open and give it a shake, and rejoice in a clear desktop area.
Jump Lists – Right click on a program icon on your task bar, and it displays not only an open this program and unpin command, but a list of the most recent files opened in the program. Select one and it opens the program with that file open in one click. No more File, Open, Browse! The jump list for IE displays a list of the most often visited sites so you can open them in one click as well.
Create folder favorites – If you’re regularly working on the same folder in Explorer then select it in the right-hand page, right-click Favorites on the left-hand menu, and select Add to Favorites. It’ll then appear at the bottom of the favorites list for easy one-click access later.
Libraries – Another method of quickly browsing to specific places in your file structure are libraries. By default, Windows 7 comes with a documents, music, pictures and video library. You can create your own (like customers) by right clicking the left pane where it says Libraries and selecting New -> Library. Once there, right click the new library and select properties, include a folder and click OK. You may also add multiple folders to a library as well as optimize it for certain file types.
Window management – you can “dock” a window to the left or right half of the screen by simply dragging it to the edge; similarly, you can drag the window to the top of the screen to maximize it, and double-click the window top / bottom border to maximize it vertically with the same horizontal width. This is invaluable if you frequently have 2 documents open side by side while working (like I do). These actions are also available with keyboard shortcuts:
Win+Left Arrow and Win+Right Arrow dock;
Win+Up Arrow and Win+Down Arrow maximizes and restores / minimizes;
Win+Shift+Up Arrow and Win+Shift+Down Arrow maximizes and restores the vertical size.
This side-by-side docking feature is particularly invaluable on wide screen monitors – it makes the old Windows way of shift-clicking on two items in the task bar and then using the context menu to arrange them feel really painful.
These are some of the tips I’ve found most useful so far on my Windows 7 adventure. What are some tips you’ve discovered? Are you looking for an easier way to do something? Let me know and I’ll share them in a future article.
Friday, July 29, 2011
Top 20 Windows 7 Tips
Here are 20 tricks to tweak Windows 7 into the interface that works best for you.
Just got your hands on Windows 7 and want to bend it to your will? No problem. We've got plenty of tips, hacks and secrets to keep you busy for a long time, including automatically opening Windows Explorer to a folder of your choice, speeding up taskbar thumbnails, finding hidden desktop themes, forcing User Account Control to act the way you'd like, keeping your Explorer searches secret from others, and more.
So check out these tips. If you like them, we'll keep more coming.
General tips
We'll start with a few nifty tips that can make your desktop more interesting, make it easier to get around and increase your computer's power efficiency.
Use Hidden International Wallpapers and Themes
When you first install Windows 7, it asks for your language, time and currency. Based on your responses, it installs a set of wallpapers and themes. If you choose English (United States) for your time and currency format, for example, the available desktop backgrounds and themes will include a United States section with scenery from locations such as Maine, the Southwest and so on.
Hidden, though, are background scenery and themes from other English-speaking countries -- Australia, Canada, Great Britain and South Africa. Normally, you can't access those backgrounds or themes, but there is a simple way you can install and use them:
1. In the search box in the Start menu, type C:\Windows\Globalization\MCT and press Enter. (Note: If Windows 7 is installed in a drive other than C:, use that letter instead.)
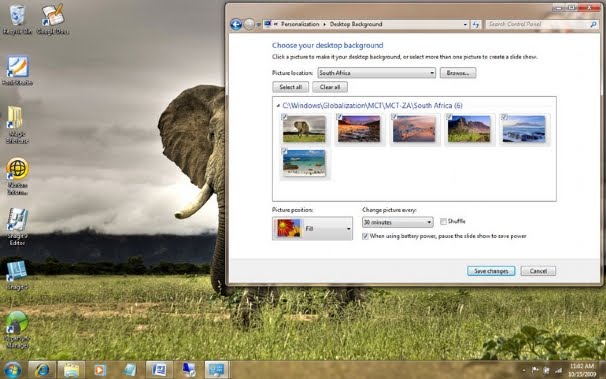
2. Windows Explorer will launch and show you a list of subfolders under C:\Windows\Globalization\MCT: MCT-AU, MCT-CA, MCT-GB, MCT-US, and MCT-ZA. Each subfolder has wallpapers for a specific country: AU for Australia, CA for Canada, GB for Great Britain, US for the United States, and ZA for South Africa.
For any of the countries whose wallpaper and themes you want to use, go into its Theme folder, for example, C:\Windows\Globalization\MCT\MCT-ZA\Theme. Double-click the theme you see there (for example ZA).
3. That will install a shortcut to the theme and wallpapers in the Personalization section of Control Panel.
You can now use them as you would any other theme or background, by right-clicking the desktop, choosing Personalize, and choosing a background or theme. They will be listed in their own section.
Shake Your Desktop Free of Clutter
If you frequently run multiple programs simultaneously, your desktop can get extremely cluttered. This can get annoying if you're working on one program and want to minimize all the other windows -- in previous versions of Windows you had to minimize them individually.
With Windows 7's "shake" feature, though, you can minimize every window except the one in which you're currently working -- in a single step. Click and hold the title bar of the window you want to keep on the desktop; while still holding the title bar, shake it quickly back and forth until all of the other windows minimize to the taskbar. Then let go. To make them return, shake the title bar again.
You can accomplish the same thing by pressing the Window key-Home key combination -- although doing that is not nearly as much fun.
Get a Power Efficiency Report
Have a laptop and want to get more battery life out of it? Windows 7 includes a hidden built-in tool that will examine your laptop's energy use and make recommendations on how to improve it. To use it:
1. Run a command prompt as an administrator. To do this, type cmd in the search box, and when the cmd icon appears, right-click it and choose "Run as administrator."
2. At the command line, type in the following:
powercfg -energy -output \Folder\Energy_Report.html
where \Folder represents the folder where you want the report to be placed.
3. For about a minute, Windows 7 will examine the behavior of your laptop. It will then analyze it and create a report in HTML format in the folder you specified. Double-click the file, and you'll get a report -- follow its recommendations for ways to improve power performance.
Subscribe to:
Comments (Atom)